

SUN NETRA X1 PROVISIONING NOTES
by Max Southall
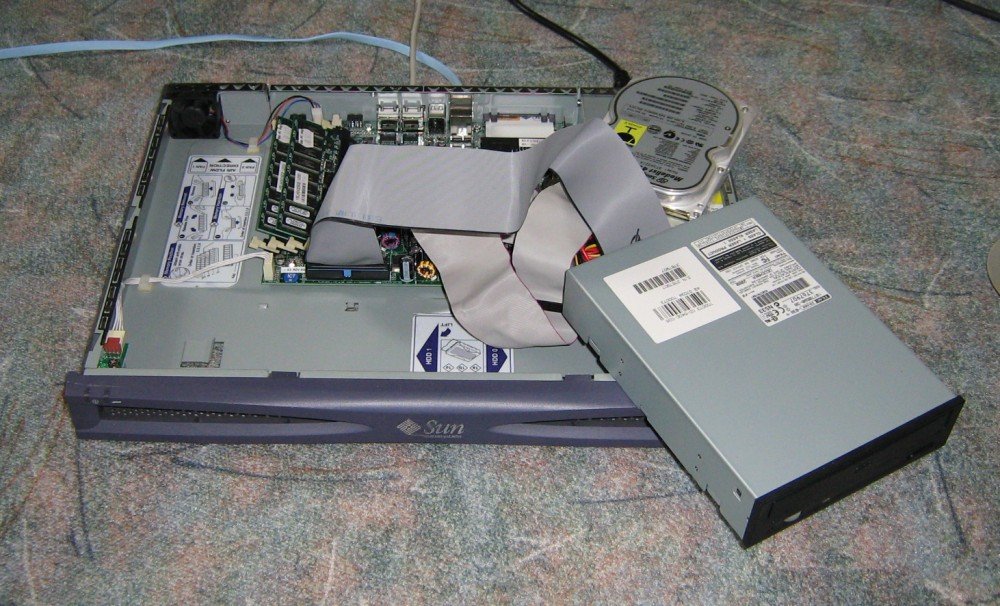
There is no provision for installing a CDROM drive in the X1; the systems are meant to have the OS installed or reinstalled over the network connection using another Solaris system as a Jumpstart server. However, it is possible to attach an IDE/ATAPI CDROM drive and configure the NVRAM to recognize it via Open Boot PROM configuration commands.
IMPORTANT NOTE: a bug in earlier systems (those unpatched) requires that there be an active network connection on an ethernet port (the first one dmfe0 as tested) or the installation process from CDROM will be unusably slow and abnormal. Therefore, attach an ethernet cable from the X1's NET 0 port to an active switch. It's not necessary to actually have the network configured as long as the physical network (and possibly layer 2) is active. A second, benign bug which can safely be ignored, occurs during system POST - WARNING: invalid vector intr: number 0x7de, pil 0x0.
You need to attach a terminal device to the console port of the X1. I used, initially, a Palm Pilot running a VT100 terminal program, attaching its serial interface via an adapter to a Cisco "blue" cable and thence to the X1. We could also use one of the cables on our Hydra console server, which is a Cisco 2600 router equipped with an async32 module, and access it via reverse telnet to the router specifying the appropriate port number. It's also possible to use a regular Cisco configured to use the aux port, or a computer with an appropriate terminal emulator program, or even a VT100 compatible serial terminal. For the Microsoft OS, you can use Hyperterm.

For the OS install media, We used the last Solaris 8 release, 02/04.
You can also now download OpenSolaris 10/3 134a Text Install ISO image and create a CD or DVD to use as the install media. See our downloads page.
Some notes on initial configuration to begin the installation, gleaned from a number of attempts:
1. Use "poweron" from the LOM CLI, then "break" into the ROM debugger, OBP.
2. The system may be set up to try to load from the network when the disk does not boot. You must send a break over the console to get it to stop, sometime after the initial config messages and the network load attempt. One way to do this is to type "#." and enter the LOM mode, as the system attempts to load from the network and fails. Then you can type "break" to get back to OBP. When this is successful, you will get an "ok" prompt from the OBP. It may be necessary to do this several times if it is not done soon after getting the initial OBP boot messages.
3. We need to boot from the CDROM. "devalias" will show that the cdrom device is at the wrong location so we will need to write a new one. "probe-ide" will show the recognized attached devices. There is a reported bug, which we also encountered, which prevents IDE recognition after a break. Therefore, once the system has been reconfigured via "setenv boot-device disk" and "setenv diag-device disk", instead of with net, it will fail to boot and then return to the "ok" prompt. To put the CDROM drive at the second IDE interface as the primary device, and have it recognized during the installation, use "nvalias cdrom /pci@1f,0/ide@d/cdrom@2,0:f"
4. The IDE drive is probably not labelled as a Sun disk, and will need to be relabelled before OS installation. Use "boot cdrom -s" after inserting the Solaris 8 02/04 disk 1 of 2 software CD, to boot into single user mode under Solaris.
5. At the "#" prompt, type "format" ... this will bring up the drive partitioning program. You should be able to choose the drive which is recognized and reported, as "0" ... then choose "label" from the menu, and "y" when asked for confirmation. When this completes, "quit" to the prompt. You can then use "init 0" to shut down the Solaris operating system and return to the OBP prompt.
6. Begin the OS installation by inserting the Solaris 8 Software Installation disk into the CD drive, and then entering "boot cdrom".
7. Follow the normal Solaris operating system software installation procedures.
Additional documentation can be found in the Netra X1 Server User's Guide, which we have in hardcopy, and which is also available as a .PDF file.
If using OpenSolaris or OpenIndiana, you will need to have an internet connection for pkg and IPS, or create a local repository from the two DVD repository images.
PASSWORD RECOVERY
Use "boot cdrom -s" after inserting the Solaris 8 02/04 disk 1 of 2 software CD, to boot into single user mode under Solaris.
Then mount the main disk "mount /dev/dsk/c0t0d0s0 /mnt" and "cd /mnt/etc"
"TERM=vt100" "export TERM" "vi shadow"
and delete the password portion of the root entry
root:TLNCkB/Or/Fow:6445::::::
so it looks like this
root::6445::::::
and then do
"cd /" "sync" "umount /dev/dsk/c0t0d0s0"
and then "reboot" ...